


Creating Beautiful Portraits with Window Light
Sometimes my photography is all over the place because I love so many genres – documentary, still life, lifestyle and portrait photography. Before I had off-camera lights, I used natural light from windows to create portraits of my children. It was a lot of trial and error to figure out what worked and what I liked best. In fact, now when I use off-camera lights I want it to look like window light. Creating beautiful child portraits with window light can be really simple so I put together a brief photography tutorial covering some basics to her you photograph your own family. As with any tutorial, especially photography, there is always more than one way to do something. And, once you have a better understanding of the foundations it makes creating and experimenting even easier since you know what is happening. Take a few minutes to see what this Boston family portrait photographer put together.
Since I’m a visual person, the video below has my setup. If you need more time to digest it, there is more information below.
Portrait Photography with Window a Light Source:
Before setting up, it is important to find a source of light that works best for you. North facing windows have always worked well for me. North facing windows give me a nice, soft light for standard portraiture. In my old house, I knew that a certain south facing window would work on a cloudy day or at certain times. It is important that you experiment and find what works best for your vision.
Materials Needed for a Portrait:
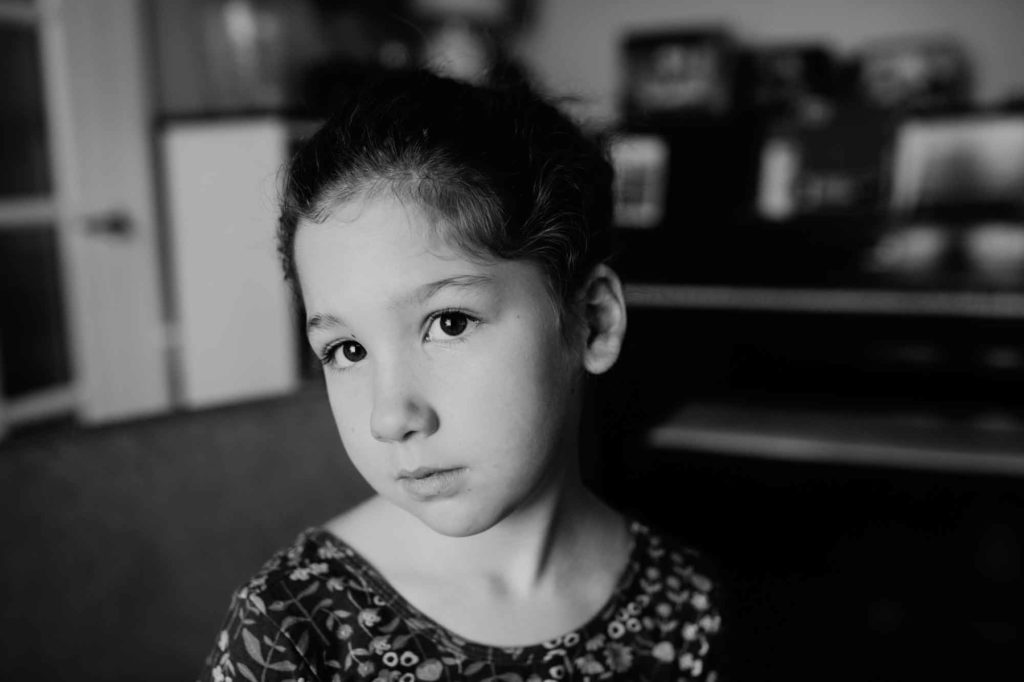
You don’t need a lot here. I used my camera, a stool for my daughter to sit on, and a basic backdrop but I didn’t even need the last two. I like using a stool for children because it helps them stay still and take direction. Without, my kids would be running around. Also, the backdrop wasn’t needed but I wanted a clean, minimalist backdrop so I used my collapsible backdrop which has a black and a white side. Here is a photo in the same area without a backdrop.
A collapsible backdrop is easy to use and the setup is so simple. Once open, I clipped the backdrop to a small table to keep it upright (see the photo in the video). Lastly, I am using my DSLR camera but the same principals apply when using the camera on your cell phone.
Learning about the different types of lighting:
In the video, I briefly talk about the placement of the light and shadows. When using natural light I love using broad and short lighting. Rembrandt lighting is another favorite of this family photographer but that is for a different tutorial.
In both examples below, take a look at where the light and shadows falls.
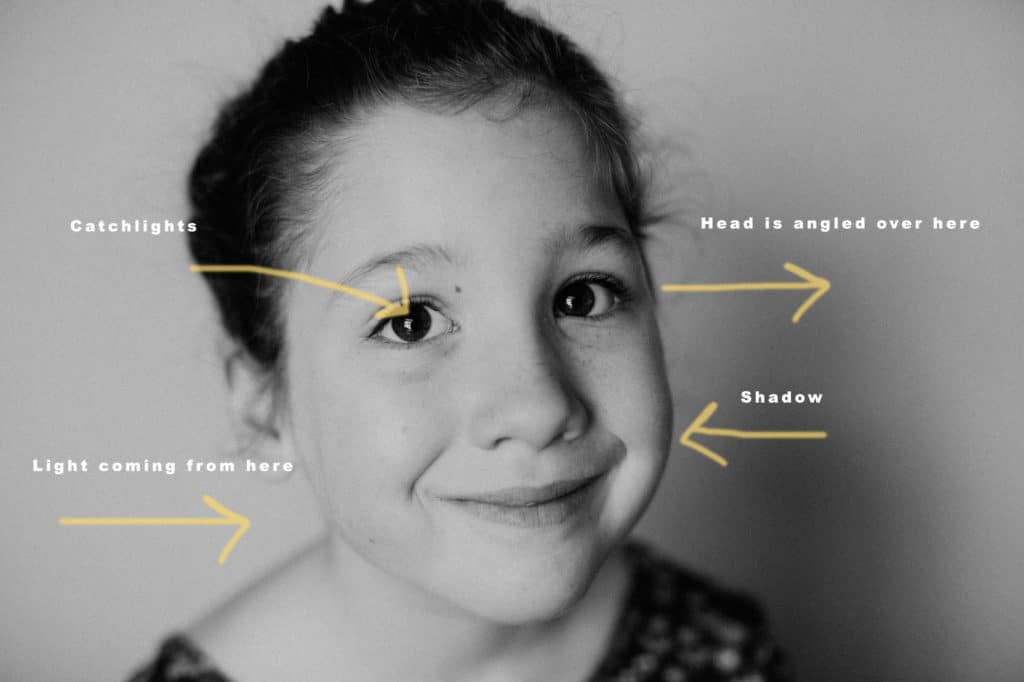
Broad lighting is when the face closest to the camera is lit. You can see the the side of here face closest to the camera is bright while the right side of her face is in shadow.
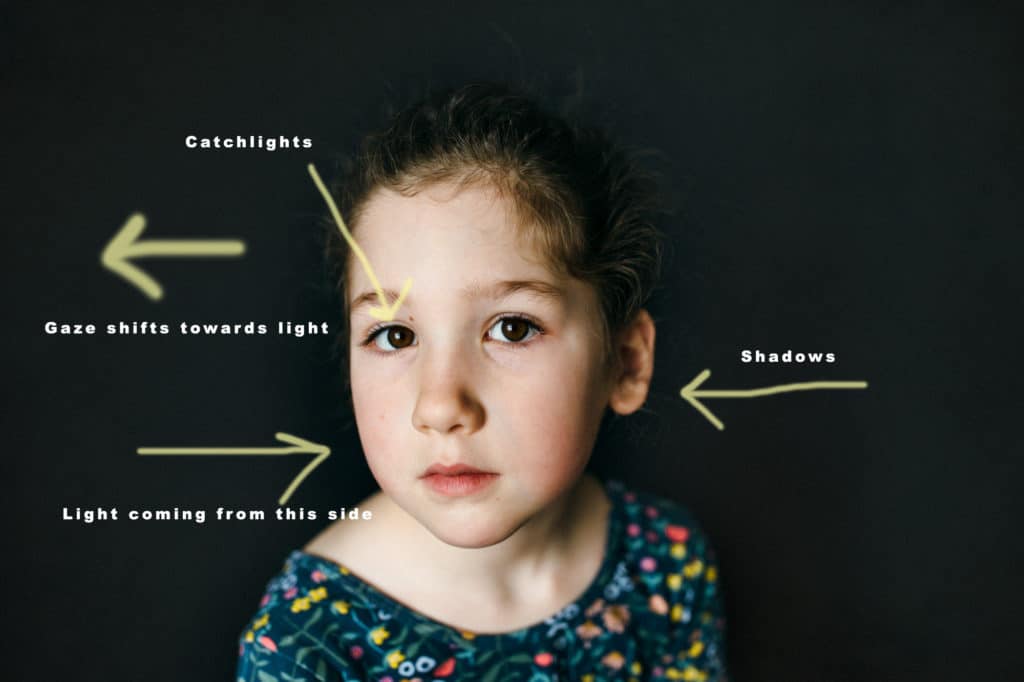
In this next example, you’ll see short lighting which is where the side of the face closest to the camera is in shadow. There is a slight tilt to her face to the left which creates a shadow on the right side of her face.
The amount of light and shadow on the person’s face can be adjusted by having the person shift his or her face or body. If she moved her head more to the left there would be more shadow on the right side of her face. You can play with the light to get the desired results since much of it has to do with your photographic vision and taste.
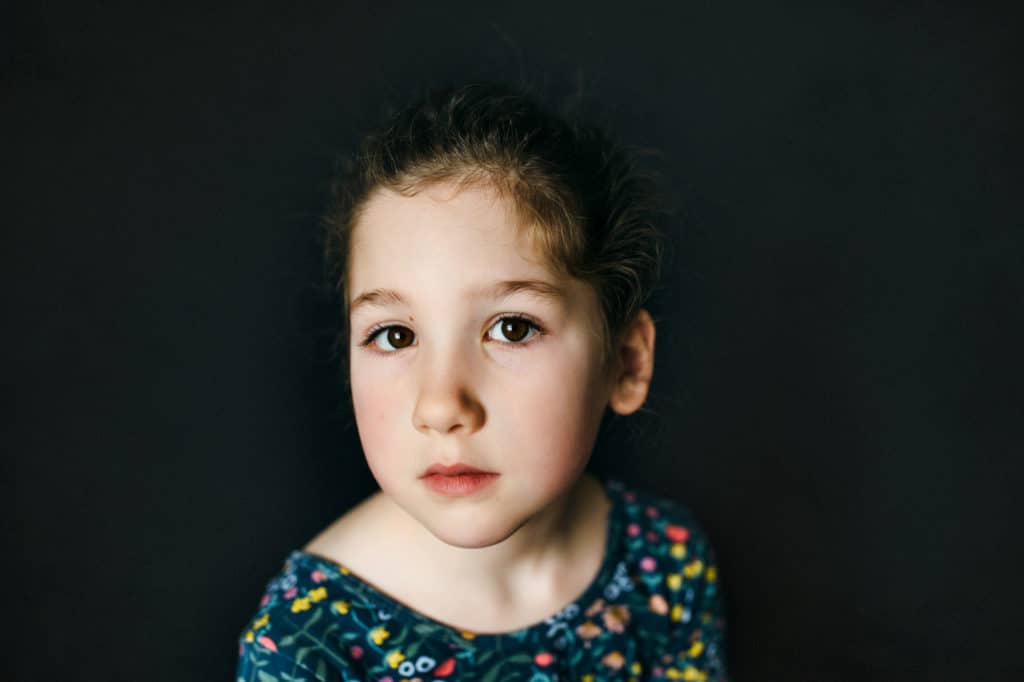
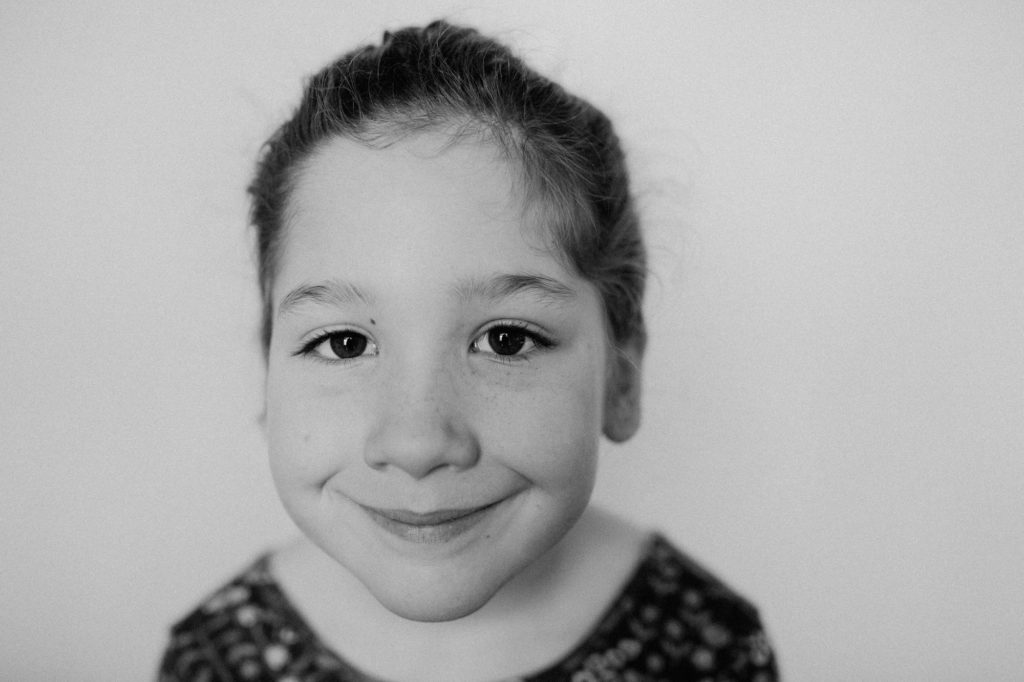
If you are looking for more even lighting, with minimal shadows, then have the person face the window directly without shifting his or her body and face. In the example below the light is even and a bit flat. However, if you look closely, you can still see that the light is stronger/brighter on the left side because the of the sun’s direction.
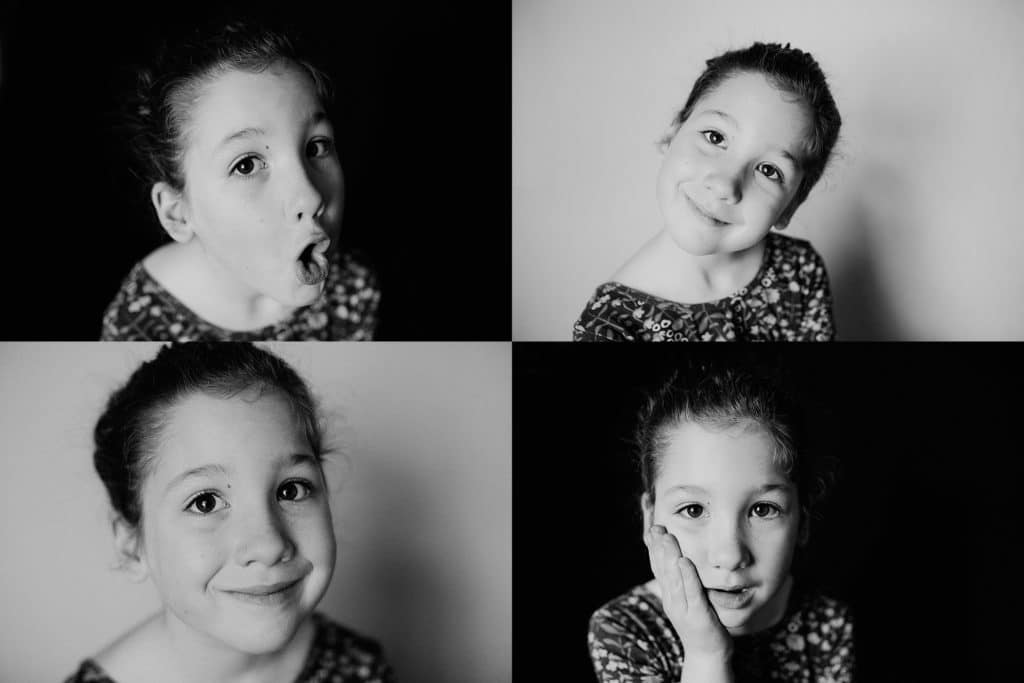
And, just one more time, take a look at how when she shifts her face the light and shadows change to give different looks and feelings to the images.
Now that you know a little bit about lighting you can start to deconstruct portraits. Examining where the light and shadows are in the image can you information about the photographer’s process. If you are interested in learning more about the different types of light such as loop, split, etc, take a look at this tutorial for a brief description on the different photography lighting and more ways to play around and learn. Happy photographing!
Did you miss the off-camera lighting photography tutorial?
